Hi ,
After creating a new company you can migrate your data to business central .so today we will discuss about " How to Migrate data to MS Business Central D 365?".After you create a new company, you need to migrate your data to Business Central. Being able to migrate your own data to Business Central is a core requirement for a successful implementation. Using the appropriate tools for data migration can speed your implementation.so lets begin with the data migration introduction and concept.
Introduction - Data
migration concepts:
Select data to migrate


After creating a new company you can migrate your data to business central .so today we will discuss about " How to Migrate data to MS Business Central D 365?".After you create a new company, you need to migrate your data to Business Central. Being able to migrate your own data to Business Central is a core requirement for a successful implementation. Using the appropriate tools for data migration can speed your implementation.so lets begin with the data migration introduction and concept.
Introduction - Data
migration concepts:
The next step after setting up a new company in Business Central
is to migrate your data. Even if you used the option to set up a company with
standard data, your company includes only standard setup data.
Typical data to migrate includes customers, vendors, and items. We will start with a
general overview of data migration in Business Central. Then we'll have a look
at data templates. We will also cover how to import data from Excel and how to
import data from other applications.
Select data to migrate
It is important to understand what data needs to be migrated. Generally, there are four
data sets:
·
General ledger accounts
·
Customers
·
Vendors
·
Items
To work with the assisted setup wizard, you can create a
Microsoft Excel file containing a sheet for each of these four types of data.
You don't have to migrate all of these tables, if the standard data already in
the system works for you.
Use the data
migration assisted setup:
To migrate your data, we recommend
that you use the assisted setup guide. It can help you transfer your business
data from an Excel file or from other formats.
The type of files that you can
upload depends on the extensions that are available. For example, you can
migrate data from QuickBooks because Business Central includes an extension that
handles the conversion from QuickBooks.
If you want to migrate
data from other finance solutions, you must either check if an extension is
available for that solution or import from Excel.


Work with
data templates:
After you import and apply the setup
data to your database, you can start migrating the customer's existing master
data, such as item and customer numbers and names. To make sure that this data
is created quickly and accurately in the new company, you should use templates
to structure the data.
A data template is something that
contains default values for groups of customers, vendors, items.
For example, suppose that you are
migrating customer data. You can group your customers by region, because all
U.S. customers have the same country/region code. They probably also have the
same posting groups and so on.
Instead of having to include the
standard information for groups of customers, vendors, and items in Excel, you
can create a data template for each region or for each customer group and
include these values in your data template. You can also use a template to add
dimensions.
Typically, you create data
templates for the following master data tables:
·
Contact
·
Customer
·
Item
·
Vendor
When you import customer data, such
as for items, from a file, the mandatory field data that you have specified is
taken from the linked data template. When you create a new item, you only enter
general information such as item name, description, and price and then collect
the rest of the mandatory field data from a selected data template.
When you create a new master data
record, such as a customer card, some fields are mandatory and must be filled
in. You can group most mandatory fields, such as
posting groups and payment terms, to make creating master data records easier
and more stable. For example, you can group mandatory fields for table 18,
Customer, as Domestic, Foreign, or Export types.

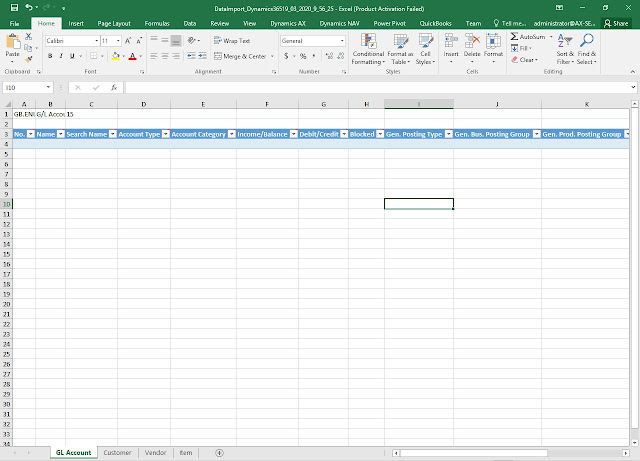
Import data from Excel:
Let's
have a look now at how we can import data from Excel. You can use the Assisted setup wizard to import general ledger
accounts, customers, vendors, and items and you can also identify data templates to use.


Import business data from other finance
systems:
When
you sign up for Business Central, you can choose to create an empty company so
that you can upload your own data and to test your new Business Central
company. Depending on the finance solution that your business uses today, you
can transfer information about customers, vendors, inventory, and bank
accounts.
From
the Role Center, you can start an assisted setup guide that helps you transfer
the business data from an Excel file or from other formats. The type of files
you can upload depends on the extensions that are available. For example, you
can migrate data from QuickBooks because Business Central includes an extension
that handles the conversion from QuickBooks. If you want to migrate data from
other finance solutions, you must either check if an extension is available for
that solution or import from Excel.
Business
Central includes templates for accounts, customers, vendors, and inventory
items that you can choose to apply when you import your data.
You
can import master data and some transactional data from other finance systems
based on the default configuration package in Business Central. On the Configuration
Packages page, you can work with the package to import and validate the data
before you apply the package.
For larger implementation
work, you can use RapidStart Services for Business Central, which is an
extensive toolkit for setting up new solutions based on your business
requirements and setup data. RapidStart Services also offers functionality for import of business
data.
Set up a company with RapidStart
services:
When
setting up a new company in Business Central, there are several similar tasks
to complete. Each company needs a chart
of accounts, number series, payment terms, and so on. But you also need to take care of, for example, the sales and purchases setup. With rapid start services, you can create
packages with setup data that you can apply to new companies. You can also
prepare typical master data tables like customers for data migration from
Excel.
RapidStart
Services helps Microsoft partners create, set up, and initialize new
installations of Business Central. RapidStart Services increases the speed and quality of those implementation steps.
RapidStart
Services provides the following
components:
·
Configuration
Worksheet
·
Configuration Packages
·
Configuration
Questionnaires
·
Configuration
Templates
RapidStart
Services can be used in various situations:
·
To configure an add-on
solution
·
To prepare a demo
·
For mass deployment
·
When switching from trial
to production
·
To configure a subsidiary
For
example, you can use RapidStart Services for a basic configuration in Business
Central, but if you also have manufacturing clients, you can create a package
with manufacturing related tables and setup.
After
you set up a default company, you can start to assemble the different elements
of the configuration package. Most important is the overview of tables that you
will need when you set up a new company.
Required
tables include the following:
·
Those that contain
default data records that are the same for each company, for example, country
or region codes.
·
Those that contain
default setup that is the same for each company, for example, source code
setup.
·
Area setup tables, for
example, Sales & Receivables Setup.
·
Supplementary setup
tables, for example, posting groups, payment terms.
·
Those that require
data migration.
·
Those that help in
posting opening balances.
These
tables will be listed in the Configuration Worksheet before
they are assigned to the Configuration Package.
The Configuration
Worksheet page contains the following fields:

·
Line
Type: Specifies the type
of the configuration package line. The line can be one of the following types:
o Area
o Group
o Table
·
Table
ID: Specifies the ID of
the table that you want to use for the line type. After you select a table ID
from the list of objects in the lookup table, the name of the table is
automatically filled in the Name field.
·
Page
ID and Page
Name: Primary page through which the database records can be viewed
directly from the worksheet by clicking Database Data on the Actions tab in the
ribbon. These fields will only be filled in for selected W1 tables. For other
tables, the user should select the page manually.
·
No.
of Records: The number of
database records. Additional settings will determine whether these records will
be included in the configuration package.
·
Licensed
Table and Licensed
Page: Indicates whether the table and page are included in the license.
·
Reference: Contains text to provide more information
about the table, or a URL linking to more detailed information.
·
Promoted
Table: Specifies whether
the table is promoted. Select the check box to promote the table in the
configuration worksheet. You can use this designation as a signal that this
table requires additional attention.
·
Responsible
ID: Specifies the ID of
the Business Central user who is responsible for the configuration worksheet.
·
Status: Specifies the status of the table in the
configuration worksheet. You can use the status information, which you provide,
to help you in planning and tracking your work.
o In progress
o Completed
o Ignored
o Blocked
You
can enter configuration worksheet lines manually or you can use the Get Tables
function in the ribbon. This function provides the following options:
·
Include
with Data Only: select if you only
want to include those tables that contain database records.
·
Include
Related Tables: select if you want
to include all tables that are related to the list of tables. Not all related
tables can be found by using the Get Related Tables function:
o It cannot find tables linked by a conditional
table relation. For example, on the Sales Line, the No. field is linked to several
different tables, depending on the Type of the line.
o It cannot find tables linked on a basis of a
filter. For example, TableRelation: Location WHERE (Code= FIELD("Location
Code")).
·
Include
Dimension Tables: select if you want
to include the dimension tables that contain the dimension details of the
database records from the filtered tables.
·
Include
Licensed Table Only: select if you want
to eliminate those tables that cannot be used because of license restrictions.
The
following video will demonstrate how to use the configuration worksheet.
After
assembling all required tables in the Configuration Worksheet, you
will now have to attach the lines to a Configuration Package.

On
the Configuration Worksheet you can select all the lines that
you want to combine into one package. The Assign Package function
will then open the Config. Packages page, from where new
packages can be created.
The Config.
Package Card page contains the following fields:

·
Code and Package Name identify
the package.
·
Product
Version: specify the version
of the product that you are configuring. You can use this field to help
differentiate among various versions of a solution. You can enter no more than 80 characters, both numbers and letters.
·
Language
ID: specify the ID of
the Windows language to use for the configuration package.
·
Processing
Order: specify the order in
which multiple configuration packages need to be imported to configure a new
company.
·
Exclude
Config. Tables: specifies whether to
exclude configuration tables (Worksheet lines, Configuration Filters,
Questionnaires, and Templates) from the package. Select the check box to
exclude these types of tables.
For
all selected lines on the configuration worksheet, the Package Code field is
now filled in with the code of the newly created package, and a checkmark is
placed in the Package Exists field. The package now contains all the necessary
tables, but can be additionally modified as follows:
·
Limit the number of
fields to be exported with the package.
·
Determine whether to
validate the fields before applying the value, when configuring a new company.
·
Determine the
processing order of the fields.
·
Filter the table data
to be exported with the package.
·
Connect configuration
templates to be used when applying data into the new company.
Removing
a table from the worksheet does not automatically delete the table from the
package. Also, removing a table from the package, does not automatically delete
the table from the worksheet. However, the connection to the package will be
lost, and the Package Code field on the worksheet line will be empty again.
The
following video will demonstrate how to use the configuration package.
To
apply a configuration package to a new company, you must first export the
package from your default company. The configuration package is exported as a
.rapidstart or .Excel file and contains the following:
·
Configuration
worksheet
·
Configuration package
card
·
Table data as filtered
on the configuration package
·
Configuration
questionnaires, regardless of whether the related table is added to the
configuration package
·
Configuration
templates, regardless of whether the template was linked to the master table on
the configuration package.
Configuration Templates:

Configuration Questionnaires:

good
ReplyDelete