Hi,
Today we will discuss about " How to Manage users and implement security in MS Business Central D 365?" which includes how to add users, create user groups ,implement permission and permission sets , configure user access times and logging ,understand users profile and role centers, & auditting changes.so lets begin the discussion.
Introduction - Add
users:
Add Users


Implement permissions and
permission sets:
Users are assigned permission sets depending on the plan assigned to the user in Office 365. You can then proceed to assign permission sets to the users to define which database objects, and thereby which UI elements, they have access to, and in which companies. When you add users to user groups, that will make it easier to assign the same permission sets to multiple users.

Permission sets function as containers of permissions, so that you can easily manage multiple permissions at a time. You must first create a permission set, and then add permissions to it.
A Business Central solution typically contains several predefined permission sets that are added by Microsoft or by your software provider.
Predefined permission sets are of the following types:
Create or modify permissions
To create or modify permissions manually, follow these steps:

In each of the five access type fields: Read Permission, Insert Permission, Modify Permission, Delete Permission, and Execute Permission, you can select one of the following three permission options:
Indirect permissions
You can assign an indirect permission to use an object only through another
object. A common example is that a user has permission to run the Sales-Post
codeunit (codeunit 80). The Sales-Post codeunit performs many tasks, including
modifying the Sales Line table (table 37).
When the user posts a sales document, Business Central checks whether the user has permission to modify the Sales Line table. If not, the user receives an error message.
The user does not need to have full access to the Sales Line table to run the Sales-Post codeunit. If the user has indirect permission for the Sales Line table, then the Sales-Post codeunit runs successfully.
When a user has indirect permission, that user can only modify the Sales Line table by running the Sales-Post codeunit or another object that has permission to modify the Sales Line table. This restriction means that user can only modify the Sales Line table when doing so from supported application areas. The user cannot run the feature inadvertently or maliciously by other methods.
Record-level security
For record-level security in Business Central, you use security filters to
limit a user's access to data in a table. A security filter describes a set of
records in a table that a user has permission to access. You can specify, for
example, that a user can only read the records that contain information about a
customer. This means that the user cannot access the records that contain
information about other customers.
Create permission sets by recording actions
To create or modify permission sets by recording your actions, follow these
steps:

Assigning a permission to a specific user
You can assign permissions to users in two ways:
Modify permissions from the Effective Permissions page
To get an overview of a user's permissions, follow these steps:
The By Permission Set part shows the assigned permission sets through which the permissions are granted to the user, the source and type of the permission set, and to which extend the different access types are permitted.
For each row that you select in the Permissions section, the By Permission Set section shows which permission set or sets that the permission is granted through. In this section, you can edit the value in each of the five access type fields, Read Permission, Insert Permission, Modify Permission, Delete Permission, Execute Permission.
To edit a permission set, in the By Permission Set part, on the line for a relevant permission set of type User-Defined, choose one of the five access type fields and select a different value.
To edit individual permissions within the permission set, choose the value
in the Permission Set field to open the Permissions page.

Understand users,
profiles and role centers:
Profiles and Role Centers
Create or copy profiles


Activate a profile
Assign a profile to a user
Export and import profiles


Today we will discuss about " How to Manage users and implement security in MS Business Central D 365?" which includes how to add users, create user groups ,implement permission and permission sets , configure user access times and logging ,understand users profile and role centers, & auditting changes.so lets begin the discussion.
Introduction - Add
users:
Once you have created a Business Central instance and have a
company set up with data, it's time to let your users test out the application.
You can add users from Office 365, and then implement security to determine
what each user can do by using security groups or assigning individual
permissions.
Add Users
In order to connect to Business Central, an individual must be a
user in the system. The Users list displays the list of users that have been
added to the system. You can't add a new user from the Users list. Instead,
users must exist within your Office 365 subscription before you can add them to
Business Central.
To add a user in Business Central follow these steps:
1.
Choose the search
for page icon in the top-right corner of the page,
enter Users,
and then choose the related link.
2.
Choose the Get
Users from Office 365 action.

3.
Any new user that has been created for your Office 365
subscription will be added on the Users page.
User information is available on the user card, which is
available from the Users list.
The user card provides information about the user, the groups
they belong to, and their permissions.
You can enable or disable a user by using the State field. A
user must be enabled to work within Business Central. If you disable a user,
you will still see this user in the Users list, but that user will no longer be
able to connect to the application.
You can see whether the users was created from Office 365 in
the Office 365
Authentication tab.
You can see which companies the user has access to, and which
user permission sets the user has access to.
Create user
groups:
You can set up user groups
to help you manage permission sets for sets of users within your company.
1.
Choose the search for page icon
in the top-right corner of the page, enter User Groups, and then
choose the related link. Alternatively, if you are on the Users page
already, you can choose the User Groups action.
2.
On the User Groups page,
choose the User Group Members action.

3.
On the User Group Members page,
choose the Add Users action.

When users or user groups are
created, you must assign permission sets to each to define which objects a user
can access. First, you must organize the relevant permissions in permission
sets.
To quickly define a new user group,
you can copy the permission sets from an existing user group to your new user
group. The user group members are not copied to the new user group. You must add
them manually afterwards.
1.
Choose the search for page icon
in the top-right corner of the page, enter User Groups, and then
choose the related link.
2. Select the user group that you want to copy, and
then choose the Copy User Group action

3.
In the New User Group Code
field, enter a name for the group, and then choose the OK button.
The new user group will be added to the User
Groups page. You can now add users to the new user group.
Implement permissions and
permission sets:
Users are assigned permission sets depending on the plan assigned to the user in Office 365. You can then proceed to assign permission sets to the users to define which database objects, and thereby which UI elements, they have access to, and in which companies. When you add users to user groups, that will make it easier to assign the same permission sets to multiple users.
A permission set is a collection of permissions for
specific objects in the database. All users must be assigned one or more
permission sets before they can access Business Central.
From the User Card page, you can open the Effective Permissions page to see which permissions the user has and which permission sets grant those permissions
From the User Card page, you can open the Effective Permissions page to see which permissions the user has and which permission sets grant those permissions

Permission sets function as containers of permissions, so that you can easily manage multiple permissions at a time. You must first create a permission set, and then add permissions to it.
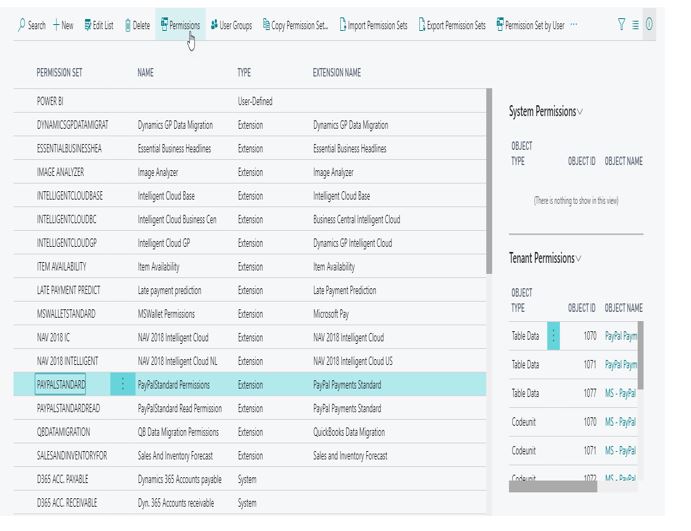
A Business Central solution typically contains several predefined permission sets that are added by Microsoft or by your software provider.
Predefined permission sets are of the following types:
·
System
·
Extension
You cannot create or edit these types of permission sets or the permissions
within them. However, you can copy them to define your own permission sets and
permissions. Permission sets that users create are of type User-Defined and
can be edited.
Create or modify permissions
To create or modify permissions manually, follow these steps:
1. On
the Permission Sets page, select the row for a
permission set, and then choose the Permissions action.
2. On
the Permissions page, create a new line or edit the
fields on an existing line.
In each of the five access type fields: Read Permission, Insert Permission, Modify Permission, Delete Permission, and Execute Permission, you can select one of the following three permission options:
·
Yes: The user can perform the
action on the object in question.
·
Indirect: The user can perform
the action on the object in question but only through another related object
that the user has full access to.
·
Blank: The user cannot perform
the action on the object in question.
Indirect permissions
You can assign an indirect permission to use an object only through another
object. A common example is that a user has permission to run the Sales-Post
codeunit (codeunit 80). The Sales-Post codeunit performs many tasks, including
modifying the Sales Line table (table 37).When the user posts a sales document, Business Central checks whether the user has permission to modify the Sales Line table. If not, the user receives an error message.
The user does not need to have full access to the Sales Line table to run the Sales-Post codeunit. If the user has indirect permission for the Sales Line table, then the Sales-Post codeunit runs successfully.
When a user has indirect permission, that user can only modify the Sales Line table by running the Sales-Post codeunit or another object that has permission to modify the Sales Line table. This restriction means that user can only modify the Sales Line table when doing so from supported application areas. The user cannot run the feature inadvertently or maliciously by other methods.
Record-level security
For record-level security in Business Central, you use security filters to
limit a user's access to data in a table. A security filter describes a set of
records in a table that a user has permission to access. You can specify, for
example, that a user can only read the records that contain information about a
customer. This means that the user cannot access the records that contain
information about other customers.
Create permission sets by recording actions
To create or modify permission sets by recording your actions, follow these
steps:
1. Choose
the search for page icon in the top-right corner of
the page, enter Permission Sets, and then choose the
related link. Alternatively, if you are already on the Users page,
choose the Permission Sets action.
2. On
the Permission Sets page, choose the New Action.
3. On
a new line, fill in the Name field.
4. Choose
the Permissions action.
5. On
the Permissions page, choose the Record
Permissions action, and then choose the Start action.

6. This
starts a recording process that captures all your action in the user interface.
7. Go
to the pages and activities in Business Central that you want users with this
permission set to be able to access. You must carry out the tasks that you want
to record permissions for.
8. When
you want to finish the recording, return to the Permissions page,
and then choose the Stop action.
9. Choose
the Yes button to add the recorded permissions to
the new permission set.
10. For
each object in the recorded list, specify if users can insert, modify, or
delete records in the recorded tables.
When you edit a permission and thereby the related permission set, the
changes will also apply to other users that have the permission set assigned.
Assigning a permission to a specific user
You can assign permissions to users in two ways:
·
Define permission sets on a user's user card.
·
Select the check box for a user, on a column,
for a related permission set, on a row, on the Permission Set by
User page. With this method, you can also assign permissions sets
to user groups.
To assign a permission set on a user card, follow these steps:
1. Choose
the search for page icon in the top-right corner of
the page, enter Users, and then choose the related link.
2. Select
the user that you want to assign permission to. Any permission sets that are
already assigned to the user are displayed in the Permission Sets
FactBox.
3. Choose
the Edit action to open the User Card page.
4. On
the User Permission Sets FastTab, on a new line, fill in
the fields as necessary.
To assign permission sets to a user on the Permission Set by
User page, follow these steps:
1. Choose
the search for page icon in the top-right corner of
the page, enter Users, and then choose the related link.
2. On
the Users page, select the relevant user, and then choose the Permission
Set by User action.
3. On
the Permission Set by User page, select the [user
name] check box on a line for the relevant permission set to assign the set to
the user.
4. Select
the All Users check box to assign the permission set
to all users.
Modify permissions from the Effective Permissions page
To get an overview of a user's permissions, follow these steps:
1. Choose
the search for page icon in the top-right corner of
the page, enter Users, and then choose the related link.
2. Open
the card of the relevant user.
3. Choose
the Effective Permissions action.
The Permissions part lists all the database objects that the user has access
to. You cannot edit this section.The By Permission Set part shows the assigned permission sets through which the permissions are granted to the user, the source and type of the permission set, and to which extend the different access types are permitted.
For each row that you select in the Permissions section, the By Permission Set section shows which permission set or sets that the permission is granted through. In this section, you can edit the value in each of the five access type fields, Read Permission, Insert Permission, Modify Permission, Delete Permission, Execute Permission.
To edit a permission set, in the By Permission Set part, on the line for a relevant permission set of type User-Defined, choose one of the five access type fields and select a different value.
Configure user access times and logging:
Administrators
can use the User Setup page to define periods of time during
which specified users are able to post and specify if the system logs the
amount of time users are logged on.
1. Choose the search for page icon
in the top-right corner of the page, enter User Setup, and then
choose the related link.
2. On the User Setup page,
choose the New action.
3. In the User ID field,
enter the ID of a user, or choose the field to see all current Windows users in
the system.

4. Fill in the fields as necessary.
Understand users,
profiles and role centers:
In Business Central, access to functionality is managed through
user groups and profiles. As an administrator, you can add and remove users as
part of your Business Central subscription, and you can assign user permissions
through user groups.
Profiles and Role Centers
The people in your company who have access to Business Central
are also assigned a profile that gives them access to a Role Center.
Profiles are collections of Business Central users who share the
same Role Center. A Role Center is an entry point and home page for Business
Central that gives a group of users quick access to the most important tasks
for their role and displays various insights and key performance indicators
(KPIs) about their work.
You can customize pages for profiles, so that all users assigned
the profile will see the customized pages.
Create or copy profiles
You can create your own profiles, or copy them.
To create a profile:
1.
Choose the search
for page icon in the top-right corner of the page,
enter Profiles
(Roles), and then choose the related link.
2.
On the Profiles
(Roles) page, choose the New action.
3.
Fill in the fields as necessary. Hover over a field to read a
short description.
Copying a profile can save you time if you want to use similar
settings to an existing profile and only want to change a few settings.
To copy a profile, follow these steps:
1.
Open the profile that you want to copy, and then choose
the Copy Profile action.

2.
In New
Profile ID field, enter a name for the profile that you
want to copy.

3.
Set the New
Profile Scope field to one of the following:
1.
System to make the new profile available to all tenant databases
that use the application.
2.
Tenant to make the new profile available to just the current
tenant database.
4.
Choose the OK button
when done.
Activate a profile
When a profile is created, you can choose where and how the
profile and its information will be made available to users.
On the Profile (Roles) page, select among the following options:
·
Enabled to specify if the related role is visible in the Available
Roles page for users to choose from.
·
Use as default profile to specify the profile that applies
to users who are not assigned a specific role.
·
Disable personalization to specify if users of the related
role can personalize their workspace.
·
Show in Role Explorer to specify if menu items to business
features included in the profile are displayed in the feature overview.
Assign a profile to a user
Users can assign themselves a role (representing a profile) by
choosing the Role field on the My Settings page. As an administrator, you can
do the same through the Profiles (Roles) page.
1.
On the Profiles
(Roles) page, select the profile that you want to assign,
and then choose the User
Personalization List action.
2.
On the User
Personalizations page, select the user that you want to
assign the profile to, and then choose the Edit action.
3.
In the Profile
ID field, select the relevant profile.
Export and import profiles
You can export and import profiles as XML files to and from the
Business Central database. Exporting and importing a profile can save you time
when configuring the user interface because you reuse an existing profile
configuration instead of having to configure a profile from scratch. If you
have a profile that is configured in a Business Central database and you would
like to reuse all or some of the same profile configurations in another
database, you can export the profile to an XML file. Then, you can import the
profile XML file into the other database.
To export a profile, you can either choose the Export Profiles action
from the Profile
List or Profile
Card page or you can search for and open the Export Profiles page.

Save the XML file to a location on your computer or network.
To import a profile, you can either choose the Import Profile action
from the Profile
List page, or you can search for and open the Import Profiles page.


You cannot import a profile that already exists in the database,
even though the XML file is named differently or has different content. You
must delete the existing profile before you can import the new profile.
Auditing
changes:
A common problem in many financial
systems is to locate the origin of errors and changes in data. It could be
anything from an incorrect customer telephone number to an incorrect posting to
the general ledger. The change log lets you track all direct modifications a
user makes to data in the database. You must specify each table and field that
you want the system to log, and then you must activate the change log.
You can enable the change log in
Business Central so you have a history of activities. The log is based on
changes that are made to data in the tables that you track. On the Change Log
Entries page, entries are chronologically ordered and show changes that are
made to the fields on the specified tables. The change log collects all changes
that are made to the table.
You activate and deactivate the
change log on the Change Log Setup page.

When a user activates or deactivates
the change log, this activity is logged, so you can always see which user
deactivated or reactivated the change log.
On the Change Log Setup page,
if you choose the Tables action, you can specify which tables
you want to track changes for, and which changes to track. Business Central
also tracks several system tables.

After you have set up the change
log, activated it, and made a change to data, you can view and filter the
changes on the Change Log Entries page.

If you want to delete entries, you
can do that on the Delete Change Log Entries page,
where you can set filters based on date and time.

A user's changes are not visible in
the Change Log Entries until the user's session is restarted,
which happens in the following cases:
·
The session expired and was
refreshed.
·
The user selected another company or
Role Center.
·
The user signed out and back in.
great
ReplyDeletewow
ReplyDeletenice post